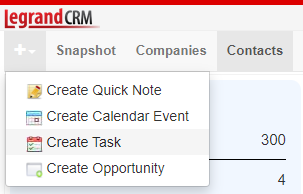
Click the ‘Quick Create’ icon in the main menu.
Select ‘Create Task’.
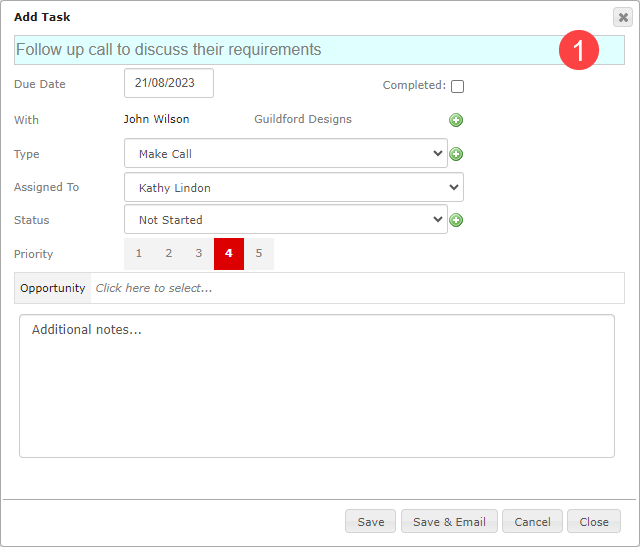
Enter a title for the task
Enter a summary of the task in the title.
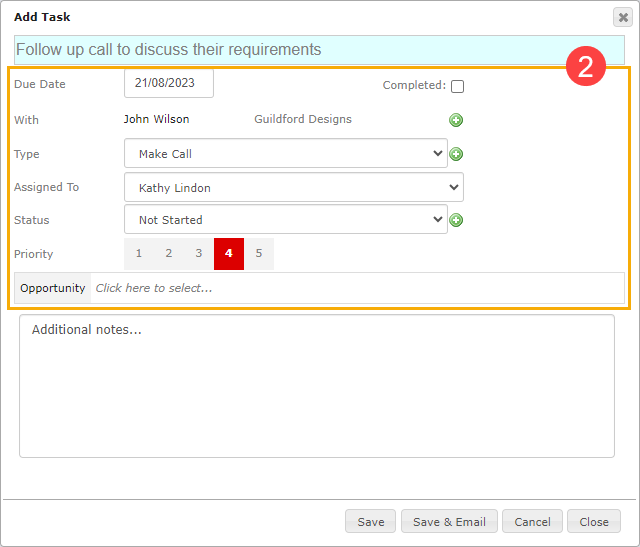
Enter task information
Enter information about the task in the following fields:
- Due Date: Select a due date.
- With: Select a contact related to the task.
- Type: Click the green icon to define the task type. For example, a task could be a phone call, a follow-up email or a simple ‘To-do’ work item.
- Assigned To: Select the drop-down to assign the task to a team member.
- Status (Optional): Click the green icon to define the task’s status. For example, ‘Not Started’, ‘In Progress’ or ‘Started’.
- Priority (Optional): Select a priority level from 1-5.
- Opportunity (Optional): Select the opportunity field to link a related sales opportunity to the task.
Additional Information (optional)
Enter additional information about the task in the text box.
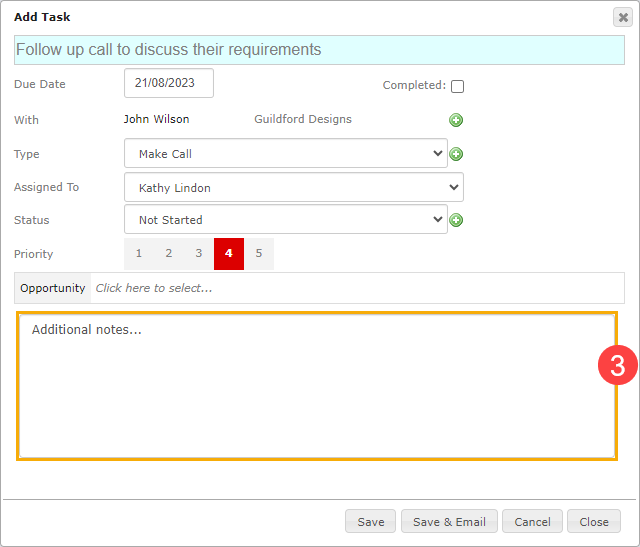
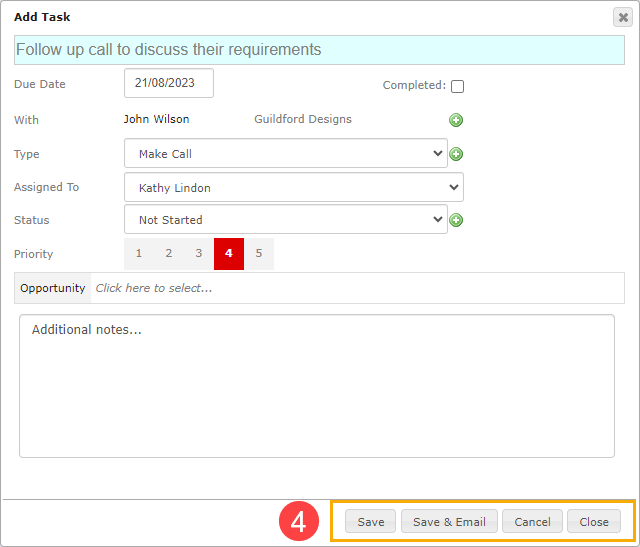
Save and send email notification
Click ‘Save’ once you finish. If you’ve configured the SMTP email settings, you can select ‘Save and send invitation’ to save the task and email the task notification to the assigned team member.