Whether you used a previous system or spreadsheets, you can easily import customer data from a CSV file into Legrand Cloud CRM. When you import data, you can map the column headings in your CSV file to Legrand Cloud CRM’s company and contact fields.
This article covers importing data from a CSV file to custom fields in Legrand Cloud CRM.
Prerequisites
- Format Custom Properties in a CSV file
- Predefine Custom Data Fields in Legrand Cloud CRM
1. Format Custom Properties in a CSV file
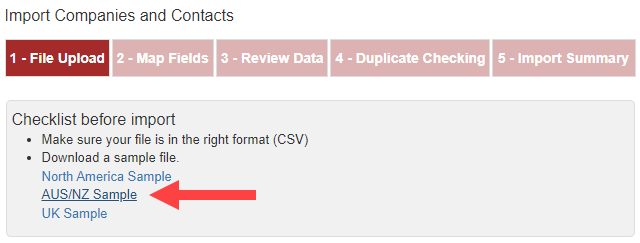
Before you import data, your CSV file needs to have the correct format. Click below to download a sample file.
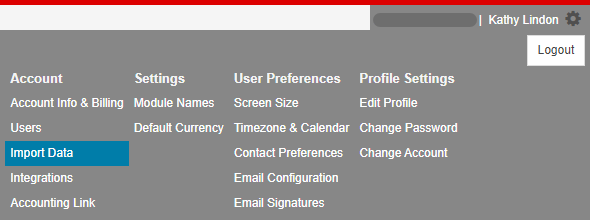
The sample files are also available in Legrand Cloud CRM’s settings menu. Click on the settings icon and select ‘Import Data’ to download a sample file.
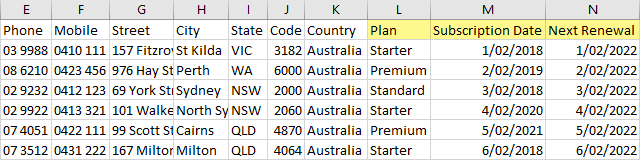
The sample file displays company and contact information in columns. You can create additional columns and map the data from the CSV file to Legrand Cloud CRM’s custom fields.
After you format the file, set up custom fields in Legrand Cloud CRM to match the column headings.
2. Predefine Custom Data Fields
Custom fields for companies and contacts are stored separately. Go to the Companies module to create a custom company field or the Contacts module to add a custom contact field.
Select any existing company or contact. In the company or contact record, click to expand the ‘Show Detail…’ tab and select ‘Click here’.

Click on the (+) icon to add a custom field. Specify the field type, enter a caption and click ‘Save’. The field types include Textbox, Number, Date, Checkbox or Drop-down field.
You can also select the number of columns and specify the column and label width.

Click here to read a detailed guide on how to add custom data fields.
How to Import Data into Custom Fields
Once you complete the prerequisites, click on the settings icon next to your user name and select ‘Import Data’.
1. File Upload
Click ‘Choose file’ to select your CSV file and click ‘Next’.

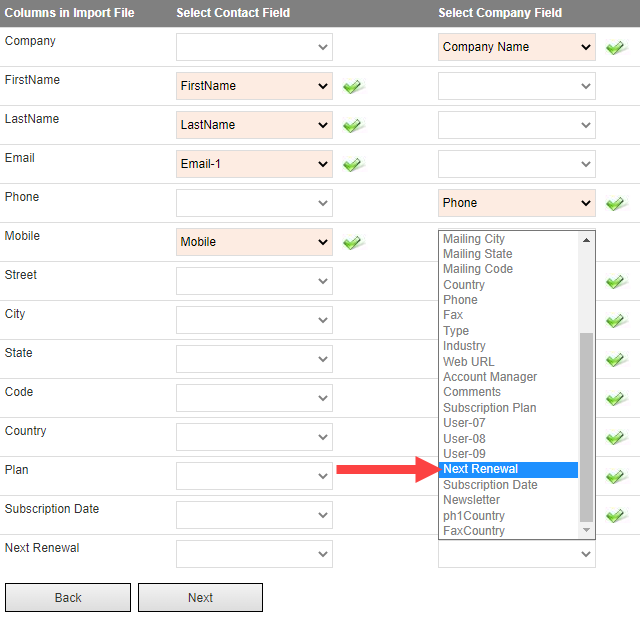
2. Map Fields
The column headings in your CSV file should appear on the left. Use the drop-down lists to map the columns in your file to Legrand Cloud CRM’s Contact or Company Fields. The custom fields you created in the Companies or Contacts module should also appear in the drop-down lists.
Click ‘Next’ once you map the fields.
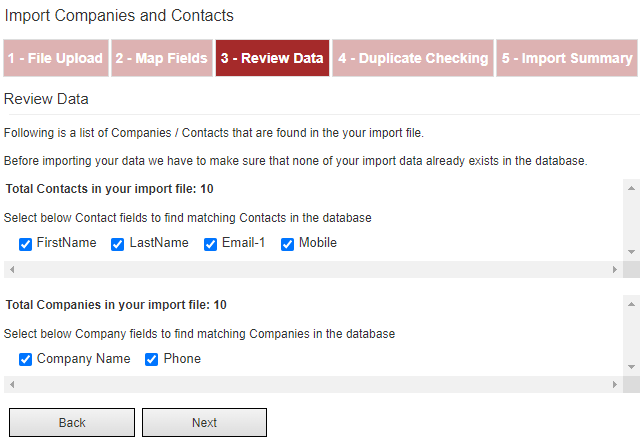
3. Review Data
Select the fields to search for existing companies or contacts in your CRM to prevent importing duplicate records.
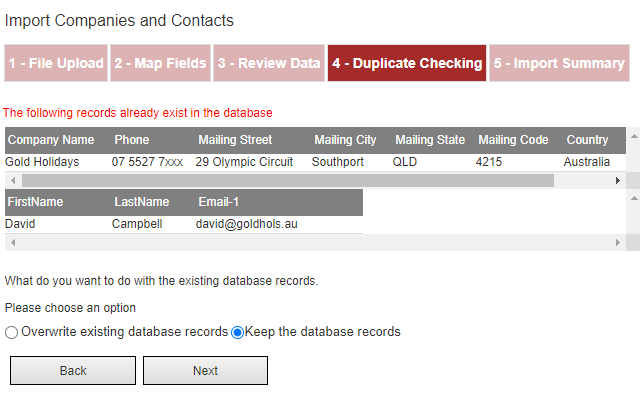
4. Duplicate Checking
If a company or contact in your file matches an existing database record, you can overwrite it or keep the database record.
Select either option below and click ‘Next’ to continue.
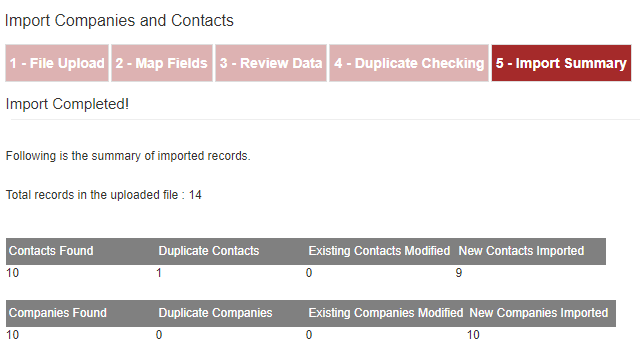
5. Import Summary
Legrand Cloud CRM provides a summary once the import process is complete. You can now manage your customers in Legrand Cloud CRM.