In Legrand Cloud CRM, you can create email templates to save time on repetitive emails. For example, you can use templates to send order confirmations, thank-you emails and renewal reminders.
Creating Email Templates
Go to the Contacts module and click the ‘More Options…’ section.

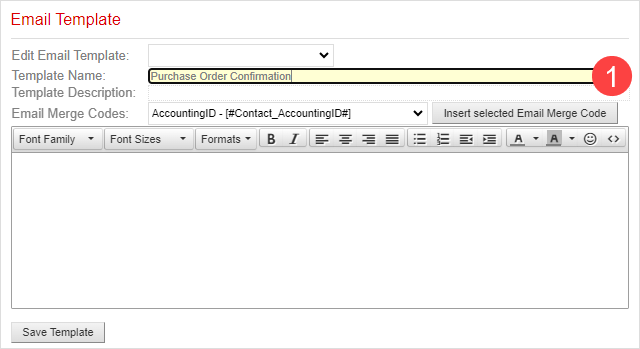
In the advanced options, click on ‘Edit Email Template’.

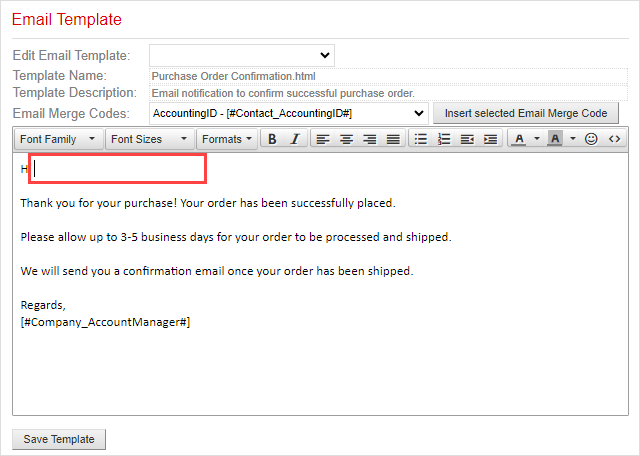
Enter a title for the email template.
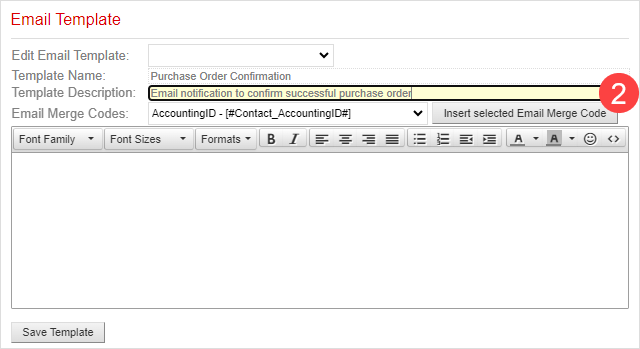
Enter a description of the template.
Enter a message in the email template body and use the formatting icons to change the text style. You can also insert email merge codes to create a more personal email message.
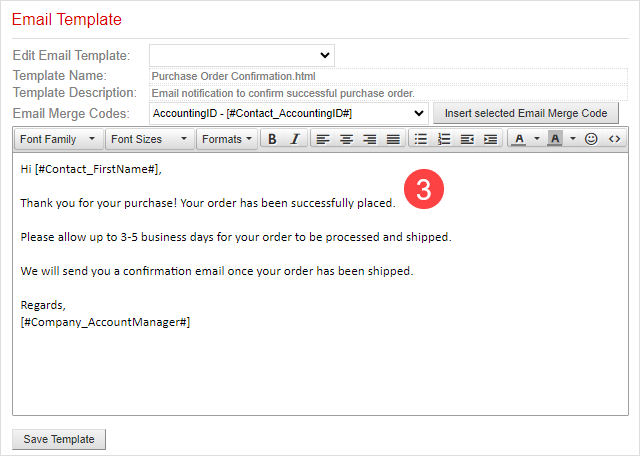
Click ‘Save Template‘ once you complete the template.
Using Merge Codes
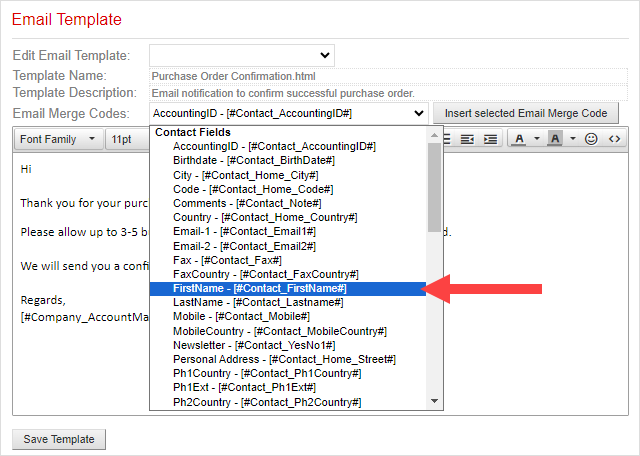
Merge codes pull data from the company and contact fields in your CRM. You can insert information such as the contact’s first name, last name and address.
To insert a merge code, place your cursor where you want to add the code.
Click the ‘Email Merge Codes’ drop-down and select a merge code.
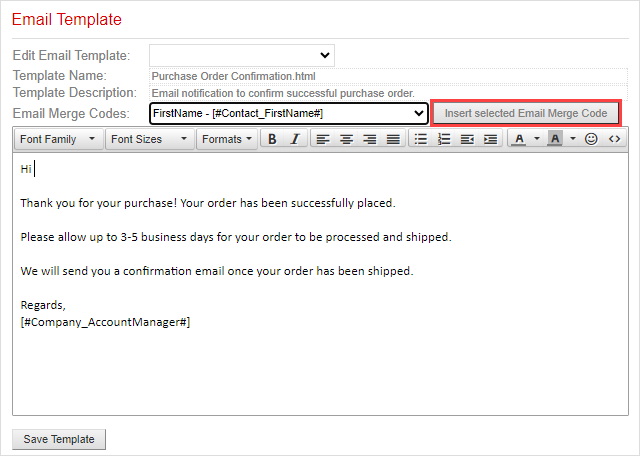
Click ‘Insert selected Email Merge Code’.
Using Email Templates
Once you create an email template, you can use the template to send emails to individual contacts or bulk send to multiple recipients.
Sending emails to contacts
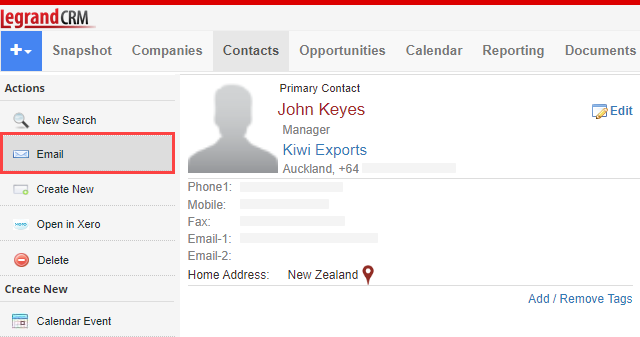
In the Contacts module, select a contact and click ‘Email’.
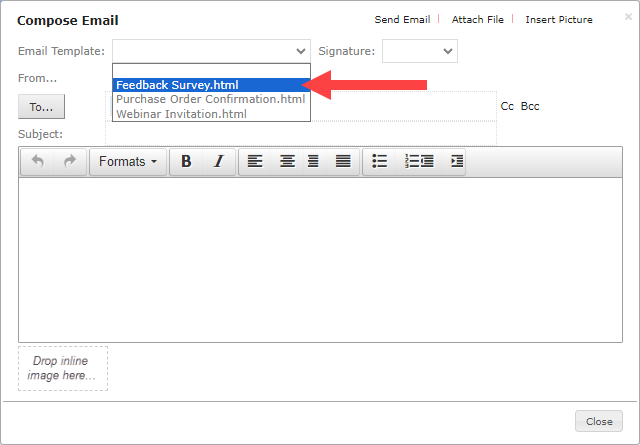
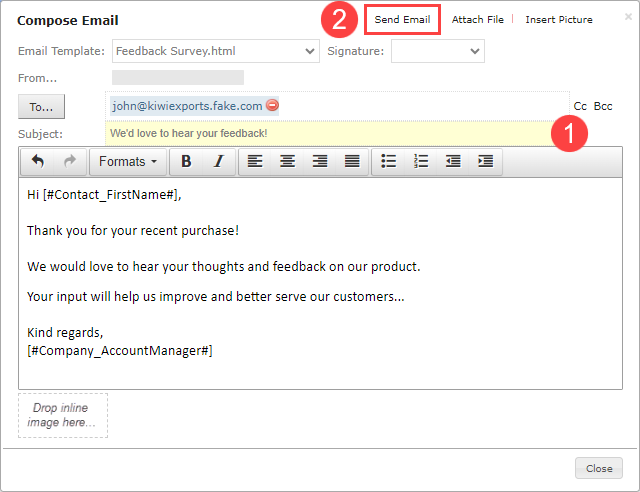
Click the ‘Email Template’ drop-down to select a template.
Enter a subject for the email and click ‘Send Email’.
NOTE: To send emails to contacts, you must configure the email settings in Legrand Cloud CRM. Click here to read how to configure your email in Legrand Cloud CRM.
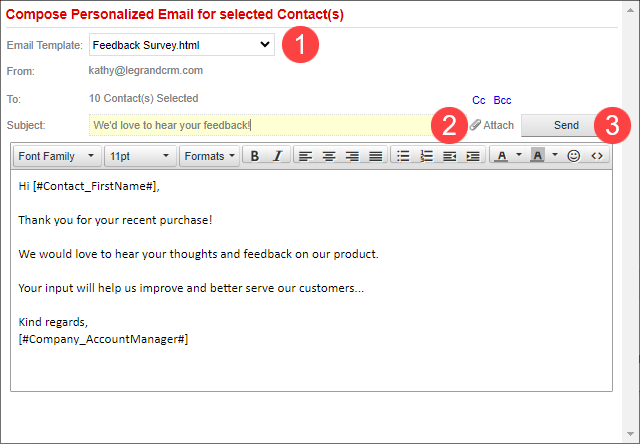
Sending personalized emails (bulk send emails)
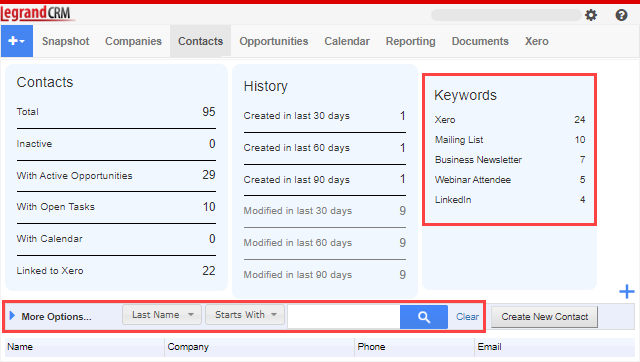
In the Contacts module, select a Keyword Tag or use the search tools and filters to display a list of contacts.
Click here to read how to create a contact list using tags.
Click ‘More Options…’ to expand the section and select ‘Send Personalized Email(s)’.

- Click the ‘Email Template’ drop-down to select a template.
- Enter a subject for the email.
- Click ‘Send’.